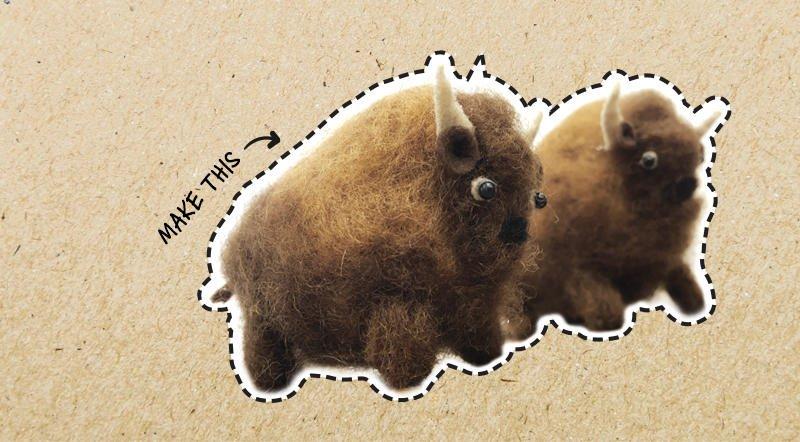
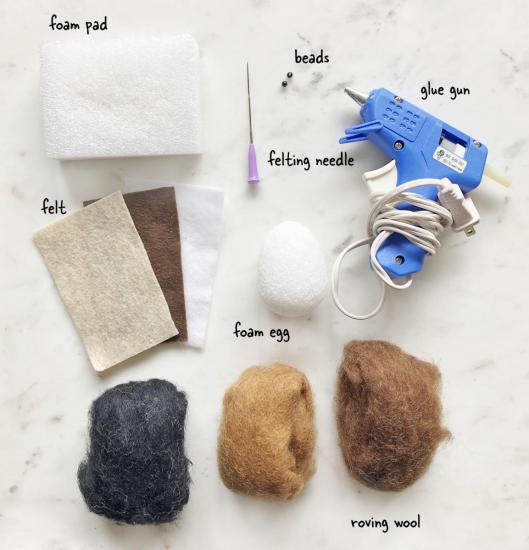
Manitoba DIY: How to make a cute felted bison

Posted April 15, 2020 | Author Breanne Sewards

Feeling creative and want to try something new? Felting has a low cost of entry and it's fairly easy to learn. Give it a try with this cute felted bison, and then read up on 10 facts that will make you love bison even more.

Materials needed

The best thing about felting is that you don't need to invest in expensive materials to get started. That being said, you will need:

  • Foam egg (*make sure it's a FloraCraft styrofoam egg or equivalent which works best for felting projects)
  • Roving wool in black, light brown and medium brown
  • Felt in beige, brown and white
  • Foam pad
  • Small black beads
  • Felting needle
  • Glue gun

Step 1: Cover the egg

Take a piece of the light brown roving wool and pull it apart so that you can wrap it loosely around the egg. Next, using the felting needle, start poking the wool into the egg. Felting needles are slightly barbed, so poking the roving wool into the styrofoam will lock it into place. With that in mind, think safety first and be sure to keep your eyes on your work so that you don't accidentally prick your finger. Continue this (adding more wool as needed to sparse spots) until you have the egg covered evenly in the wool. This process can take anywhere from 5 to 15 minutes.

Step 2: Form the bison's hump

Now that you've had some practice with simple felting, start adding more light brown wool to the bottom (or wide) part of the egg. You want to focus on what will be the top of your bison, as this will form the hump on the back. You can make this as dense as you want, or fluff it up using your needle if you want the look of a hump without using a ton of wool.

Step 3: Start the face

Take the dark roving wool and felt it into the egg to create the bison's face. You want the shape to be oval, tapering slightly at what will be the chin.

Step 4: Form the facial features

Next, do a little sculpting on the face by adding small bits of wool with your felting needle until you get the desired look. Typically, bison have pronounced foreheads and chins, but you can go for any look you think is most accurate.

Step 5: Add a nose

Using your black roving wool, poke in a nose for your bison at the mid-bottom of the face.

Step 6: Add more 'fur' on the head and chin

There's a reason why animals are the most popular subjects for felting projects! The texture of the wool lends well to fur, which is what this next step is all about. Loosely poke in extra dark brown felt at the top of the head and the chin. You don't need to poke it in as much as the other parts, as you want it to be a little wild and untamed looking.

Step 7: Add dark brown wool to the back and belly

Starting at the back and using your felting needle, cover the bison's rear end in dark roving wool, Continue to cover the bison's belly, coming up the sides. You can use a sparse piece of wool for the sides to create a more gradient look as it transitions from dark brown to light brown wool.

Step 8: Form the legs

Create the bison's four legs separately by using your foam block. First, take some dark brown wool and roll it up it a cylinder type shape. You can adjust how much wool you've using depending on how tall you want your bison to be. Put the clump of wool onto the foam block and start locking the fibres together by poking into it with your felting needle. The foam block makes this step easier but is actually optional.

Step 9: Attach the legs

Once your wool fibres feel pretty solid, you can repeat the process four times and then attach the legs to your bison by poking the tops of the legs into the bottom of the bison. Mistakes aren't that big of deal in felting, as you can always pull pieces off to reposition or change things.

Step 10: Add more fluff to the bison's chest and belly

Using the same loose technique that you did when adding more fluff to the bison's chin and forehead, take the dark brown wool and poke some 'fur' into the bison's chest and belly. Remember: unruly and wild is totally acceptable when it comes to bison.

Step 11: Cut out your bison's horns, ears, eyes and tail

Again, you can choose the respective size you want these pieces to be according to the size of your bison.

Step 12: Glue the bison ears and horns

Using the triangle and teardrop shapes above, you want to squeeze the wider part of the shape together to form a horn and ear shape. Take your glue gun and carefully apply some glue into the parts you've squeeze together so that they stay in place.

Step 13: Assemble

This is where it all comes together. Glue the white felt dots on first, followed by your black beads to make eyeballs. Don't worry if your bison looks a bit zany: all is fair in the world of craft. Finally, glue the ears in front of the horns and finish your bison off with a tail. It's as easy as that!

The final product

About The Author

Hey! I'm Breanne, Editorial Content Specialist for Travel Manitoba. First to jump in the lake and last to make it down the River Trail. Lover of croissants, cats, and croissant-shaped cats. Got a story idea? Email me at bsewards@travelmanitoba.com.

Editorial Content Specialist